Showing posts with label question of the day. Show all posts

Sunday, May 10, 2015

Super Sunday: Happy Mail and Giveaway Reminder!!!

Hi peeps! 


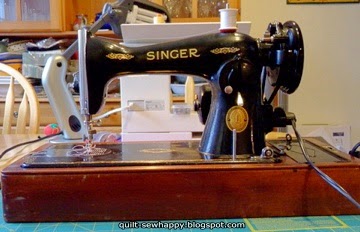
We are having amazingly beautiful weather this weekend…but I can't go out and enjoy it as I have a migraine starting to build…groan…so today's post will be shorter than normal.

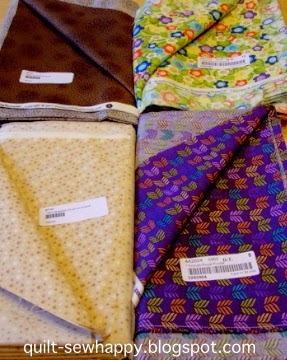
I received the above fat quarters in the Canada-only swap on Facebook I have mentioned before. April's theme was "April showers" and as you can see, there was a wide interpretation of the theme! 

I'm especially fond of the bright green fattie, as there are cute little umbrellas all over and words to a verse on spring rain.


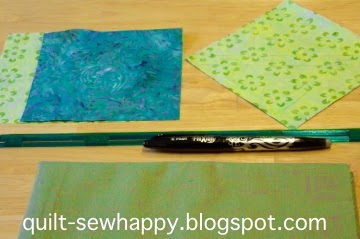
I belong to another Facebook swap with a Canadian pen pal from Newfoundland, which is a province at the other side of the country(a large island off the eastern coast of Canada). 

In the past couple of months she sent me these three mottled fatties! They are really great blenders and I am so happy to have them! She also sent the cute fridge magnet. It is already on my fridge!


These items are also from the pal in Newfoundland-a crocheted hot pad/table protector, some embroidery floss(great for sewing buttons on quilts-though not for babies!). 
There is a big bag of assorted lime green buttons(cool!), and the cute pack of Canadian symbols buttons, bottom right. I will have to make up a Canada-themed wall-hanging so that I can use those buttons! There is a maple leaf, RCMP hat, snowflake and others inside.


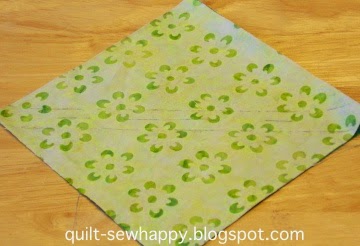
I got these two charm packs from a Canadian seller's group on Facebook. I like buying 2 of the same charm packs as I rarely make really small quilts(except for baby quilts, table toppers and zippy pouches). I would need a larger amount of charms to make a lap or bigger sized quilt.

Giveaway is now closed and the prize has been awarded.

GIVEAWAY REMINDER!!!

These are the prizes I will be sending to one lucky individual!

There is still time to enter my Sew Mama Sew Giveaway(YAY!)! Giveaway closes today at midnight, pst. The Hubs will pick a lucky winning number tomorrow!


*Comments for the giveaway must be on the "Giveaway" post(link above) to be eligible to win.


In case you missed it, Part 2 of my Country Village Quilt-A-Long, featuring a block I designed(shown above) was published this past Wednesday. You can head over to that post using this link and it is also located in the Country Village QAL tab just below my blog header!

*Stay tuned for Part 3, this Wednesday, May 13th.


Last, but not least, I want to wish all of the moms out there a very Happy Mother's Day! I hope everyone has great weather and are able to spend time with their families.
The Kid had to start work at 11 am, so I won't be able to spend any time with him till after supper. He did give me a kiss on the cheek as he was leaving…a huge surprise! Believe me when I say that teenage boys DO NOT give kisses to their moms anymore…sniff..!
The Hubs gave me a much-needed gift certificate for a pedicure! Yay! 

Question of the Day:

Do you(if you are a mom) receive a Mother's Day gift from your child(ren)?…or does your Hubby give you one?


Sharing is caring!!! 
Don't forget that I am happy to share with your friends…feel free to pin to Pinterest, post on Google+ and Facebook, and Tweet away! Just please play fair and make sure your posts link back to this blog. 

*If you mouse/hover over the top right corner of my photos, a red "Pin-it" button will show up and all you have to do is click it to be taken to Pinterest. There is also another red button right beside it for posting to Facebook and Twitter. Or, you could always use the little square grey buttons at the end of this post.


Thanks for reading and have a great day! 

Quilty Huggs, 

Jacqueline 

PLEASE NOTE: This blog accepts forms of compensation such as, but not limited to; fabric/notions/patterns/books in exchange for a posted review and/or tutorial. All comments/critiques/opinions are completely my own and are not those of the provider. This blog may also contain affiliate links and I will receive a small commission if you make a purchase after clicking on one of my links. Thanks so much!

Monday, March 23, 2015

WIP Progress, Springing and a Tutorial!

Hi peeps! 


How is everybody doing today??? Did ya miss me? Laid low again with a weather-sparked migraine that lasted a week, eek! 

Before I was incapacitated I managed to get my citrus batik table topper put together-border and all! I am still amazed at how pain-free the HST's were…guess I never bothered to measure and trim them before…ha ha ha...it had been that long since I worked with HST's! 

I have spray-basted it to some older-stash fabric and am good to go for quilting…but I am still undecided on which pattern to FMQ(free-motion quilt) with my Pfaff. It will be on our large coffee table and will get spilled on, folded over and generally well-used so I think it should be densely quilted. The one that is on the coffee table now was quilted with a fairly tight meander and while that is the easiest FMQ design to do, I am a little bored with it.

This was made with two packs of Timeless Treasures charms I got from Craftsy during their Boxing Week Clearance Sale. I actually bought 4 from them and don't know just yet what I'm going to do with the other two packs. I had a few squares left over from the above project as I was working with specific dimensions, so I'd like to work them into the next project as well.


I took this picture early last week. This is part of the tree that is in our minuscule back area. This one usually grows so much in the summer months that it ends up touching our kitchen windows! Now, would you believe, the buds are fully open and little leaves are starting to grow.


Home-Made Spray Starch Tutorial

I don't really like to use the spray starch in a can as it has an icky slightly-sweet smell…and of course, the fumes and the ozone layer. This recipe is a mix of a couple I have seen online with a few personal tweaks!

You will need:

2 cups of cold tap water
4 Tablespoons of cornstarch
1 Tablespoon of vodka(yes, really…very important)
5 drops of Lavender essential oil(or a favourite, just not a citrus-based one as even small amounts might cause a stain)
1 spray bottle(got mine at the dollar store)
-mixing bowl, measuring cup for liquids, measuring spoons, fork and a funnel


In your mixing bowl combine the water, vodka and cornstarch and mix well using a fork. Don't add the essential oil yet!


With the help of your funnel, pour the resulting liquid into your spray bottle. Remove the funnel and add your essential oil. I use lavender as it has a nice smell, but you could use a different oil such as peppermint or rosemary...but no citrus-based oils as they can leave oil spots on your items!

Now give your spray starch a hearty shimmy & shake. This helps to mix the essential oils in well. The reason I wait till the end to add the essential oils is that I don't want to waste any of it in the mixing bowl. Just mixing the oil in with a fork will not disperse the oil throughout the spray starch mixture and some of the oil will stick to the bowl's sides, which is a waste in my opinion.


Now, keep your spray starch near you ironing board and spray, spray, spray away, but use sparingly-a little will go a long way! Just remember to give it a good shake before each use as the cornstarch tends to settle to the bottom once the bottle is set down. 

It should stay fresh for a month or two! When not in use, I put mine in the fridge and it lasts longer.

If you find that you have some white residue on your fabric after the spray has dried, just give the area a little swipe with your fingers or a damp cloth. The white residue is just plain old cornstarch!

Why the Vodka you ask? Vodka(or any clear alcohol, but not rubbing alcohol) acts like a dispersant and a binder(emulsifier)-helps the essential oils mix with the water, and will also help the spray starch stay fresh, as it is a preservative.

Enjoy!


Thanks so much to the peeps who commented about my new vintage Singer machine! I was directed to a couple different websites and can now say I know this about her:
Model#15-91
Made in St. John's, Quebec, Canada in 1948

My model was one of the first of these models to come off the assembly line, as I noticed there are some things missing: the face of the stitch lever(on the right) doesn't have any numbers on it for stitch length and there is no gold "Made in Canada" decal situated on the top of the machine head.

I also now know that I put the needle in the wrong way...DUH! While on modern machines you put the needle in with the shank facing the back, this Singer must have the needle shank facing the left! 

I have also started looking on eBay and Etsy for a Walking Foot and a few other things I like to have. Someday I would like a wooden cabinet to store her in, so I could set her up in the living room and not have to move her on and off the kitchen table…Featherweight she is not!!!


Today is the last day of Craftsy's Spring Blowout Sale! Scoot on over for amazing deals on fabric, sewing kits, and quilting kits!


I have been looking longingly at this kit: Letters Home Tea and Biscuit Table Runner since Craftsy first shared it! When you use this link, just scroll down the page to see the kit. It is on sale HALF PRICE for $25.43(this is the price in CA$-it will be much cheaper in US$)!!!

They even have a few of the lovely Aurifil thread sets…but these are going fast.

Question of the Day: 

 How should I machine-quilt my citrus batik table topper? I really need some ideas peeps!

Sharing is caring!!! 

Don't forget that I am happy to share…feel free to pin to Pinterest, post on Google+ and Facebook, and Tweet away! Just please make sure your posts link back to this blog. 

*If you mouse/hover over the top right corner of my photos, a red pin-it button will show up and all you have to do is click it to be taken to Pinterest. There is also another red button right beside it for posting to Facebook and Twitter. Or, you could always use the little grey square buttons at the end of this post.


Thanks for reading and have a great day! 

Quilty Huggs, 

Jacqueline 

PLEASE NOTE: The writer of this blog accepts forms of compensation such as, but not limited to; fabric/notions/patterns/books in exchange for a posted review. All comments/critiques/opinions are completely my own and are not those of the provider. This post may also contain affiliate links and I will receive a small commission if you make a purchase after clicking on my link. Thanks!

Sunday, March 15, 2015

A New Addition to the "Family" and a recipe!

Hi peeps! 


So…can you guess what I just got???


I found this vintage Singer on Craig's List, and my Uncle went to pick it up for me! She was a little bit dusty so I gave her a good clean. The wooden base has that slightly musty smell that wood gets when it is in storage for too long. That doesn't bother me so much, I can always stick a dryer sheet in there, to soak up the smell.


Here you can see most of her decals...they are in excellent condition, and are quite pretty.


Here's a close-up of the decals and her serial number. I had a look online and found a site which can help you date your machine and find out the model number. I think this is a 15-90 model, made in 1948…but I am not totally sure, so I also emailed Singer to see if they could help date her for me.


On the bottom of the foot pedal it says "Made in Canada", but that is probably only where the foot pedal was made.


The box with the accessories in it also said "Made in Canada"…so the mystery deepens! I'm hoping Singer will be able to give me some info on where she was made.

I managed to get her threaded and popped in the bobbin, but the stitches are not completing, so I'm not sure if it is the new needle I put in it, or possibly I threaded it incorrectly. All in all, still a good deal for only $45!!! I don't mind putting some $$ on her to make her run like a dream. 

So many people say how wonderfully these old cast-iron machines run. She sure is heavy though, the Hubs had to oomph a little to get her onto the kitchen table!!!


This recipe was in the Vancouver Sun this past Wednesday,though it is actually from the Portlandia Cookbook. We defrosted a small chicken overnight on Thursday and made the soup on Friday. We all ate a hearty bowl of this soup on Friday for supper and there was enough soup leftover to be an accompaniment to a sandwich on Saturday night for all 3 of us.

Tortilla Soup with Chicken

2 T. vegetable oil
1 medium onion, finely chopped
2 large Poblano peppers, stemmed, seeded and finely chopped*
2 large cloves of garlic, finely chopped
2 t. ground cumin
6 cups low-sodium chicken broth
kosher sale and black pepper
4 corn tortillas, cut into 1 inch strips
1/4 cup fresh cilantro leaves, plus more for garnish
4 cups cooked & shredded chicken(we used a small chicken and it was fine)
1 cup hominy, rinsed & drained**
Sour cream and broken tortilla chips for garnish
*we used a small can of mild green chilies as there were no Poblanos in the store
**There was no Hominy to be found so we subbed in a can of corn niblets

In a large pot, heat the oil and add the onions, chilies, garlic, cumin and salt and pepper to taste. Cover and cook over medium heat, stirring occasionally until softened-about 5 mins.

Add the broth and tortilla strips, cover and bring to a boil. Simmer over low heat until the vegetables and tortilla strips are very soft-about 5 mins.

Add the 1/4 cup of cilantro and using a stick blender, puree the soup until smooth.

Add the chicken and hominy and simmer uncovered for 5 mins.

Ladle the soup into shallow bowls and garnish with sour cream, cilantro and broken up tortilla chips.

Note-I would not omit the tortilla chips at the end as they add some needed salt taste to the soup.

This was a fast and easy soup to make and is now a favourite. I hope it will become yours too!

***********************

Question of the day:

Does anyone out there own a vintage seeing machine, and if so, which one?also, what shall I name my new-to-me vintage Singer?

Sharing is caring!!! 

Don't forget that I am happy to share…feel free to pin to Pinterest, post on Google+ and Facebook, and Tweet away! Just please make sure your posts link back to this blog. 

*If you mouse/hover over the top right corner of my photos, a red pin-it button will show up and all you have to do is click it to be taken to Pinterest. There is also another red button right beside it for posting to Facebook and Twitter. Or, you could always use the little grey square buttons at the end of this post.

Thanks for reading and have a great day! 

Quilty Huggs, 

Jacqueline 

PLEASE NOTE: The writer of this blog accepts forms of compensation such as, but not limited to; fabric/notions/patterns/books in exchange for a posted review. All comments/critiques/opinions are completely my own and are not those of the provider. 

This post may also contain affiliate links and I will receive a small commission if you make a purchase after clicking on my link. Thanks!

Tuesday, February 3, 2015

Tutorial Tuesday: Deconstructing a man's cotton dress shirt for it's fabric!

Hi peeps!


So I thought I would show you how I take apart a men's dress shirt for the purpose of using the fabric for quilting. I like using X-L or Large-sized long-sleeved 100% cotton men's shirts as you get the most useable fabric out of them.

Here we go! 

Pick up a men's dress shirt from your local thrift store, or even your husband's closet-just make sure it's one he doesn't wear anymore! I get mine at Value Village, usually when they have a half price sale. Give it a good wash and dry. You'll be tempted to iron it, but I have found it easier to just start cutting as-is, then give the fabric pieces a nice press afterwards.


Start by cutting the collar(with collar-yoke attached), cuffs and button plackets off. 


Cut off all the sewn edges of the cuffs and collar, removing the collar yoke at this time. I save all the buttons of the shirt and safety pin them together(bottom left of photo).


Turn the entire shirt inside out and remove the sleeves by cutting them away just below the  shoulder seam line. Cut out the button placket too(as above) and add the buttons to the safety pin you have already started for this shirt.


Next, cut the shirt-back away from the shirt-fronts at the shoulders, again cutting just before the seam allowance. Cut the yoke off of the top of the back piece, then cut around the edges of the yoke to separate it into two pieces.

Edited to add: I usually trim the bottom hems off at this step.


If one of the shirt-fronts has a pocket, cut that front section right across the middle side to side, just under the pocket. Then cut around the three sides of the pocket(left, right and bottom), just inside the seam. You can see the two pocket pieces and cut-aways above left.

Or, you could save the pocket for another project such as; using it when you construct a tooth-fairy pillow or, hand-sew the pocket to your quilt back, after you have finished quilting it. Then you can store a few pieces of the fabrics that you used in the quilt for mending it if it gets damaged or worn. Just make sure you leave yourself a nice seam allowance(before cutting) so that you will be able to sew the pocket into your item and to sew the little pocket full of fabric shut if it is stitched to the back of a quilt.


Here you can see the skinny strips above left (from the cuffs and collar), as well as the two yoke pieces and both front sections. I have ironed all pieces at this point, except for the button areas. The skinny pieces will go into my tub for string quilts, and I will probably cut the larger pieces into my favourite sizes( 2" sq, 2.5" sq, 4.5" sq and 5" sq charms).


Here are the back(folded) and sleeves(folded). The sleeves are great for cutting 2'5" strips and they will go into my strips tub. It always surprises me how much fabric is in a sleeve! I will leave the back as-is, as it is quite a large piece of fabric. This one measures 24" by 27" at it's widest points.


This is perfect TV work. I will grab my handy little seam ripper and release the buttons from the plackets, then I will store them on that same safety pin, in my button jar. The label is easy enough to remove with same ripper. Then, to camouflage the stitch holes where the label was, I just run the tip of my seam ripper gently across them. You will see the stitch holes 'magically' disappear.


This little pile is ALL that is left over. Pretty cool, eh?


I got started on the table runner I mentioned in this post

I finally got my Frixion pen to work. The little metal ball at the tip of the pen was stuck, so I got some rough, heavy-duty paper(that had some 'tooth' to it) and just scribbled away till the roller ball started working. Oh, duh!!!


I was having so much fun(not!) drawing the sewing lines on my pairs of squares that I went overboard(didn't pre-read the pattern…) and traced out the sewing lines on ALL of the squares. Double-duh!!! But it is with the Frixion ink and the marks will just iron away.

Then, over to my chair, watching TV, I used my 'special' pins(they are very short and very sharp and I keep them for when I am working on batiks only) and just pinned near my starting and ending lines. Now I am ready to shoot them through the sewing machine.


I found a new-to me magasine at the grocery store today. It is called Make it Vintage, and has loads of ideas for changing up old or thrifted items and making them your own. There was another magasine that was similar, called Vintage Style, but it was a lot more than I am willing to spend on a magasine…so I just had a quick look through it!

Question of the Day:

Have you bought, or looked through a new-to-you magasine lately? and, if so, which one was it?
Thanks for reading and have a great day!


Quilty Huggs,

Jacqueline

Sunday, February 1, 2015

Sooo, wanna see what I got for Christmas???…and What I'm Working on Now!

Hi peeps!


Each year, when we gather together for American Thanksgiving, it is a family tradition that we stick everyone's Christmas lists on my MIL's fridge. So, my Hubs suggested that I choose my own Christmas gifts(from him and the Kid) this year. To be fair, my Hubs was having a pretty busy time at work.

Woo-Hoo! Super-bonus points for him!!! Hee Hee Hee

This was when all the great Black Friday sales were going on, so I clicked on over to Connecting Threads(a favourite on-line shop of mine) and went to town! 

I love how they label each piece with fabric name and your yardage cut


They had their books at 40% off and deep discounts on selected fabrics, patterns and notions. The purple print is called "Fronds".


The pretty drawstring bag and thread snips were from my Dad

I also got the Morroccan Tiles pattern that has been on my CT wish list for ages. I am thinking of pairing solids with small amounts of 'modern' fabrics for that one. 

That teal tool on the far right is a half square triangle ruler. I've had a 6"-long one for years, and needed the longer one to finish that Jumbo Prism Pillow I was working on in this post.

It was sure hard to not open that box when it arrived a week later!


I had been saving up so that I could take advantage of Craftsy's big after-Christmas sale. These table runner kits were bargain priced(about $6 each!), so I picked up 4(shown above). The kit contains 40 5" charm squares of Batik fabrics in the Punch colour line, plus a free pattern. I have been meaning to make a new runner for our coffee table and thought these bright citrusy prints would brighten the place up.


I opened up one package and started thinking about which squares to pair together, as I would like some contrast in each pair. I will be using two packages as our coffee table is quite large.


I surfed my stash and found the perfect fabric for binding. It is a cross-weave of two slightly different colours and will be perfect binding. The photo doesn't do it justice, it is more shimmery in person. Is shimmery a word? If not, it should be! hee hee hee

This is a half-yard piece, so if I cut my binding strips straight of grain instead of on the bias, I will have enough for the large table runner, as well as for one of the extra kits.


I started marking my sewing and cutting lines on the lighter squares, using my new half-square ruler and a black Frixion pen. It doesn't show up very well here I'm afraid, but is dark enough for me to see it while sewing. 

I am having a problem with my Frixion pens not working all that well…does anyone know what might be the problem and how I can fix it?

Click here to go directly to Craftsy!
Affiliate post:
Did you know that Craftsy is have a huge Winter Wonderland sale? They are offering up to 65% off fabrics/kits/notions and classes. The classes never expire and you own them for life, so you can go back a watch them as many times as you like! I have several! It is completely FREE to Join Craftsy.

Sale ends at midnight February 2, 2015 MST, so don't delay!

QUESTION OF THE DAY:

Tommorrow is Groundhog Day…will he see his shadow?

Comment below!

PS: I'd like to thank each and every one of you who emailed me to see if I was doing okay. I was having a difficult time health-wise, and lost my bloggie voice for several months.


Thanks for reading and have a great day!

Quilty Huggs,

Jacqueline